 |
Using Data Transformation Services (DTS) |
|||||||||||||||
| ||||||||||||||||
| Web Site Hosting | Web Design | Broadband/Access | E-Mail Solutions | Accept Credit Cards | Hosting Support | |||
Note: this page applies to old account types we no longer offer. We have left it up since it may be helpful for someone, since they get a decent amount of search traffic. All current hosting plans with a control panel use Plesk.
If you are an ITS client please contact us for assistance for your account.
It may be possible to use a custom DTS script to accomplish a full transfer of all objects. However, this would be beyond the scope of our support. We suggest that you contact Microsoft directly for such information.
The recommended way to "transfer" a database from a development server to our shared server would be to generate a TSQL script for all database objects, change where necessary, and then execute the script on the server. Then, the user could use DTS or BCP or some other method to just copy data. Unfortunately, this method may require a knowledgeable and experienced user.
Note: The procedure works with both the SQL 7 version of Enterprise Manager and the SQL 2000 version of Enterprise Manager. The screenshots are from the SQL 2000 version so the SQL 7 Version will look a little different.
Generating SQL Scripts
1. Generate your scripts using Enterprise Manager:
2. Right-click your database and then click All Tasks/Generate SQL Script.
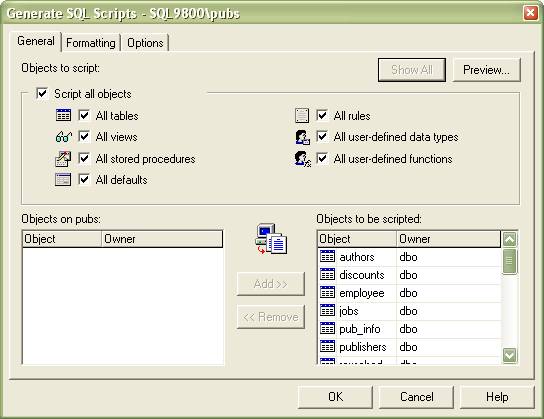
3. In the General tab, select all objects (tables, views, stored procedures, etc.) by enabling the Script all objects option (click Show All if necessary).
4. Click the Formatting tab.
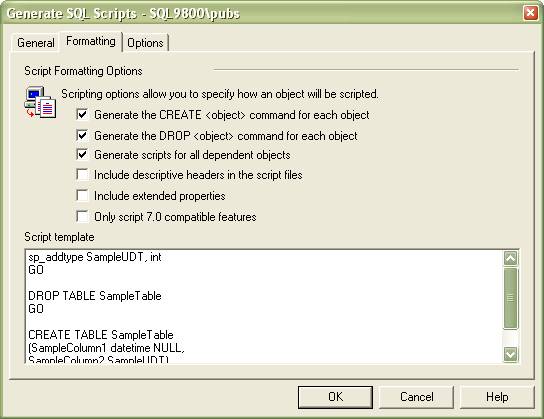
5. In the Script Formatting Options section, choose whether or not to generate the DROP statements and dependent objects. Note that this is an option, not a requirement.
6. Click the Options tab.
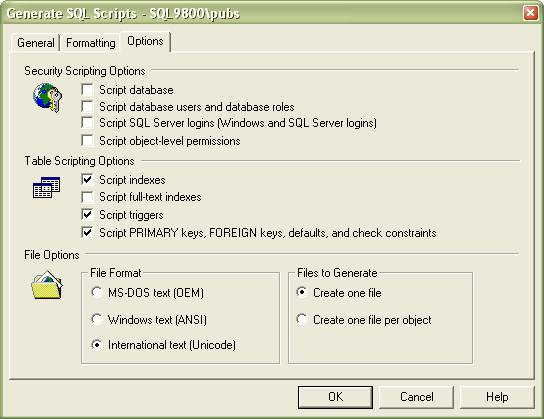
7. Deselect all Security Scripting Options. Note that all other option in the Options
tab can be selected or deselected as you wish.
8. Click OK to save the script as a file on your hard drive.
Follow-up procedure
After the script is generated, you will need to make some modifications. Use a text editor with search and replace to replace all instances of "dbo" (or whatever user owned the objects on the source server) and replace it with your userid. Note that if you chose the option to generate DROP statements, you will have to leave the reference to "dbo" in the parts of the script where system tables such as "sysobjects", "systypes", etc. are being qualified.
Also, remove any calls to the "setuser" function as these will fail.
There is another caveat. Enterprise Manager doesn't always generate the statements in the right order so you may have to move things around in the script. For example, it may generate a statement for a stored-procedure or a user-defined function that references a table that is created further down in the script.
Once the script has been executed on the destination server (using SQL Profiler), you can use DTS or another method to get the data to the tables. If your tables have foreign key constraints and relationships defined, you may have to transfer your data in separate batches so that you don't violate referential integrity.
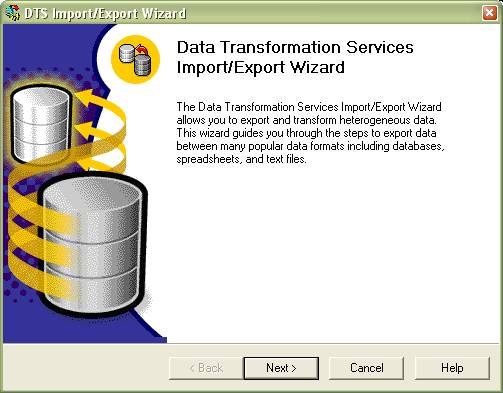
DTS Steps
Follow the information provide in the following graphics to help you import or export data through the Data Transformation Service Wizard.
1. Start the Data Transformation Services Import/Export Wizard.
2. Click Next.
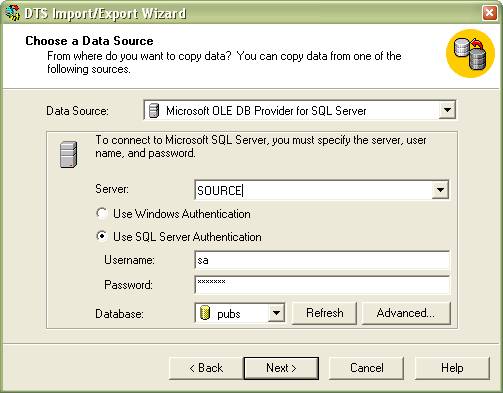
3. In the Choose a Data Source dialog box, select the source of the data. Fill in the following fields with the information necessary to access the data source:
- The Server containing the data
- The Username and Password needed to access the data on the server
- The Database containing the data
Before proceeding to the next step, enable the Use SQL Server Authentication option.
4. Click Next.
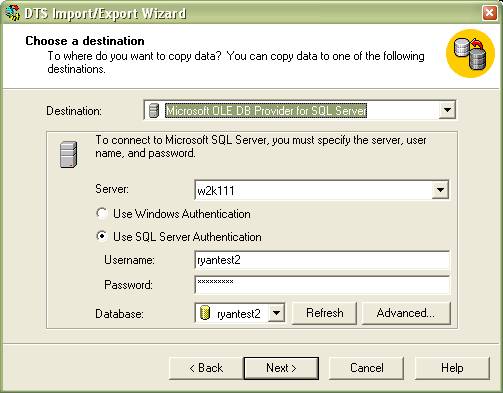
5. In the Choose a destination dialog box, complete the following fields with the information related to the destination of the data to be transferred:
- The Server to which the data will be transferred
- The Username and Password needed to access the destination server
- The Database into which the data will be transferred.
Before proceeding to the next step, enable the Use SQL Server Authentication option.
6. Click Next.

7. In the Specify Table Copy or Query dialog box, enable Copy table(s) and views from source database.
8. Click Next.
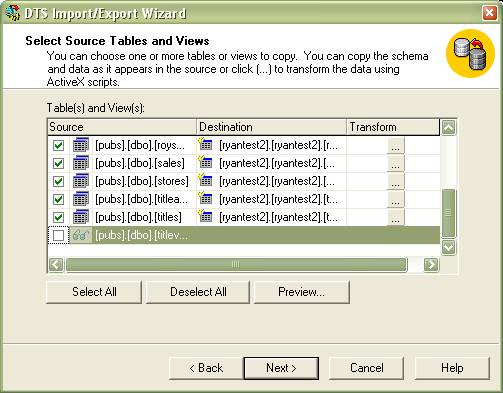
9. In the Select Source Tables and Views dialog box, select all tables but uncheck all views. Note that the wizard modifies the destination side to appropriately qualify the tables with the appropriate owner.
10. Click Next.

11. In the Save, schedule, and replicate package dialog box, enable Run immediately.
12. Click Next.
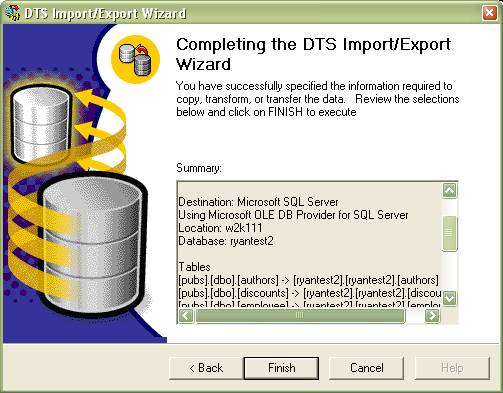
13. In the Completing the DTS Import/Export Wizard dialog box, click Finish.
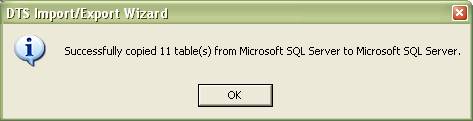
14. When you receive confirmation that your data was successfully copied, click OK.
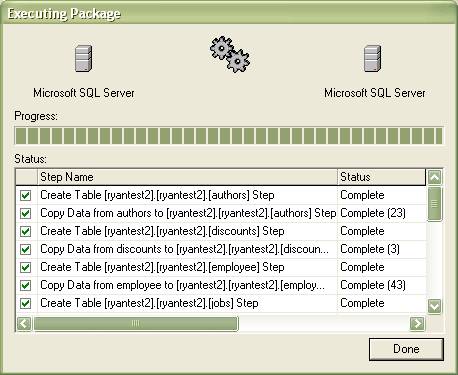
15. When the Progress bar in the Executing Package dialog box is finished, click Done.
Now you should have all data and tables copied. It is now time to get the other SQL Server objects. Repeat the steps mentioned above until you arrive at the following dialog box:
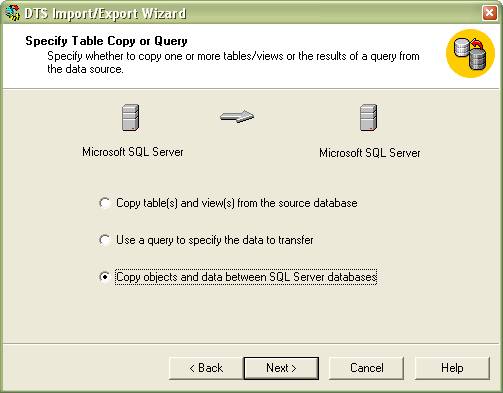
16. In the Specify Table Copy or Query dialog box, enable Copy objects and data between SQL Server databases.
17. Click Next.
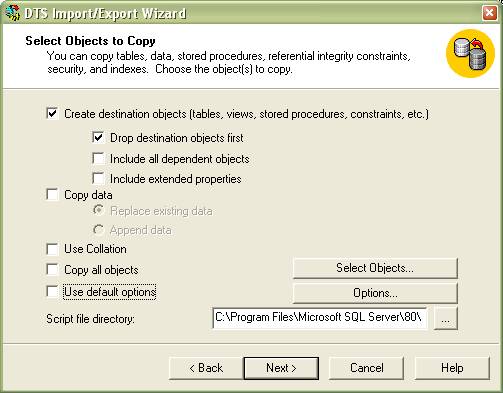
18. In the Select Objects to Copy dialog box, locate the Create destination objects section, enable Drop destination objects first.
19. Enter the necessary path in the Script file directory text field. If you need additional information regarding the Script file directory, click the Help button.
20. Click Next.
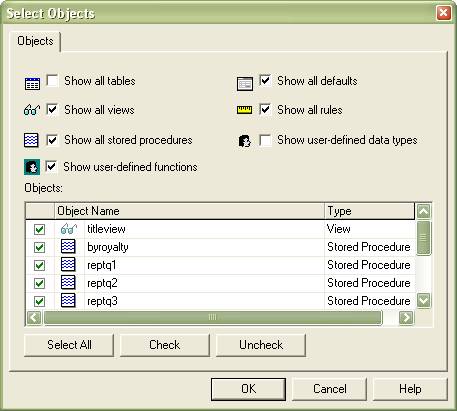
21. In Objects tab located within the Select Objects dialog box:
- Deselect Show all tables as all of the tables have been transferred already
- Deselect Show user-defined data types as it is necessary to create those on the destination side first
All other options in the Objects tab should remained enabled.
Note: Unfortunately, it is not possible to use DTS to transfer UDTS on our servers. This is because the script that the DTS wizard generates calls "SETUSER" statements which can only be executed by a DBO or sysadmin.
22. Click OK.
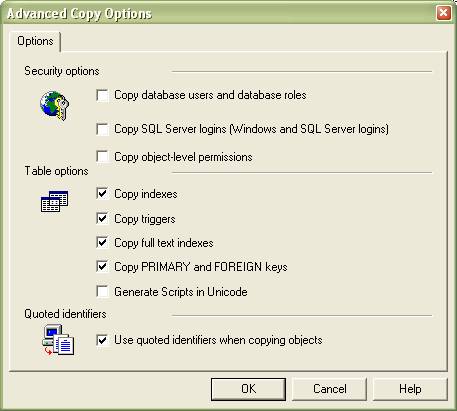
23. In the Options tab of the Advanced Copy Options dialog box, deselect ALL three Security options.
Important: This is a very important step: all three of the Security options must be turned off.
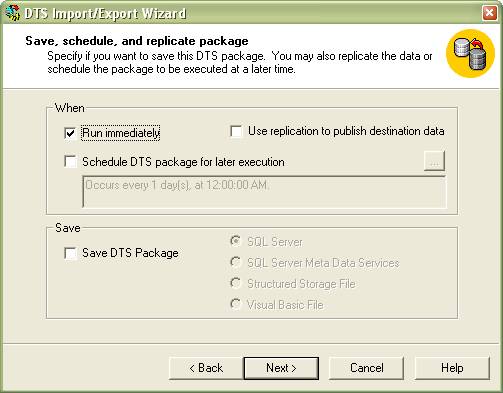
24. In the Save, schedule, and replicate package dialog box, enable Run immediately.
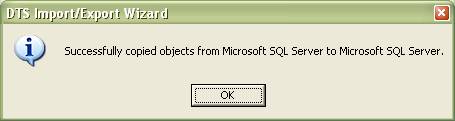
25. When you receive confirmation that your data was successfully copied, click OK.
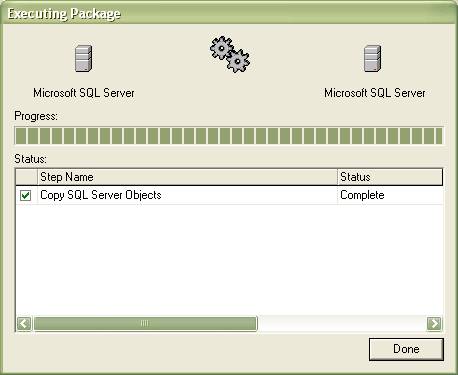
26. When the Progress bar in the Executing Package dialog box is finished, click Done. You're finished!
Conclusion
This support document simply tries to show some basic ways to transfer database objects and data. You may find different combinations of these techniques that are more appropriate for their database. For example, you could use the DTS wizard to transfer tables and data to the server and then use SQL scripts to apply constraints, indexes, keys, triggers, etc. after all of the data already exists.
For the latest information on how to use Data Transformation Services, we suggest that you visit Microsoft's DTS Overview web page.
Please note: the information on this page applies to ITS web hosting plans. It may or may not apply to other environments. If you are looking for a feature described here, or better support from your hosting provider, please consider hosting your site with ITS!
Copyright © 1996-2026, Integrated Technical Solutions, Inc., all rights reserved. See Terms/Legal for trademarks, copyright, and terms of use.
Naperville, IL 60563
fax 630.420.2771